Introduction:
Insulating a shed floor is a critical step in optimizing comfort and energy efficiency within your outdoor space. Whether you use your shed for storage, as a workshop, or even as a small living area, proper insulation helps regulate temperature, prevent moisture buildup, and protect your belongings from damage. In this comprehensive guide, we'll explore essential techniques for how to insulate a shed floor effectively, providing you with the knowledge and strategies to create a comfortable and functional environment.
Understanding the Importance of Shed Floor Insulation:
Shed floors are often overlooked when it comes to insulation, but they play a significant role in maintaining a comfortable and efficient space. Insulating the shed floor helps create a thermal barrier, reducing heat loss in colder months and preventing heat gain in warmer months. Additionally, proper insulation helps prevent moisture buildup, which can lead to mold growth and structural damage over time. By insulating the shed floor, you ensure a more comfortable, durable, and energy-efficient space for all your needs.
Assessing Your Shed's Needs: Before you begin the insulation process, it's essential to assess your shed's specific requirements. Consider factors such as the climate in your region, the intended use of the shed, and your budget constraints. These factors will help determine the type and amount of insulation needed to achieve optimal results. Additionally, take into account any existing insulation or moisture issues in your shed, as these may impact your insulation strategy.
Choosing the Right Insulation Material: Selecting the appropriate insulation material is crucial for effective shed floor insulation. Common options include rigid foam insulation, fiberglass batts, spray foam insulation, and reflective foil insulation. Each material has its advantages and disadvantages, so it's essential to consider factors such as R-value, moisture resistance, and ease of installation when making your decision. Additionally, take into account your budget and the specific requirements of your shed to ensure you choose the right insulation material for your needs.
Preparing the Floor Surface: Proper preparation of the shed floor surface is critical for a successful insulation project. Start by cleaning the floor to remove any dirt, debris, or moisture that could affect adhesion. Repair any existing damage, such as cracks or holes, to ensure a smooth and even surface for insulation installation. Additionally, consider installing a vapor barrier to prevent moisture from seeping into the insulation material and causing damage over time.
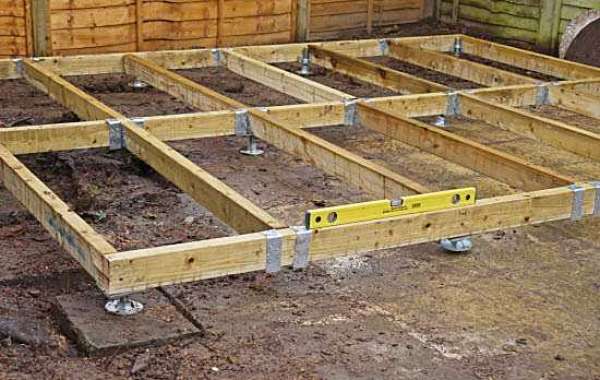
Installing the Insulation: Once the shed floor surface is prepared, it's time to install the insulation. Begin by measuring the space between the floor joists and cutting the insulation material to fit snugly in place. For rigid foam insulation, simply place the insulation between the joists, ensuring a tight fit. For fiberglass batts or spray foam insulation, use adhesive or staples to secure the insulation in place, taking care to seal any gaps or voids completely. For reflective foil insulation, staple the insulation to the underside of the floor joists, making sure to overlap the seams for maximum effectiveness.
Sealing Air Leaks: Sealing air leaks is essential for maximizing the effectiveness of your shed floor insulation. Use caulk or expanding foam to seal any gaps or cracks around the perimeter of the floor and between insulation panels. Inspect the exterior of the shed for any gaps or openings where air could enter or escape and seal them as well. Proper air sealing will help maintain a consistent interior temperature and prevent energy loss.
Adding Finishing Touches: Once the insulation is installed and air leaks are sealed, consider adding finishing touches to your shed floor to enhance its comfort and functionality. Install a subflooring material such as plywood or oriented strand board (OSB) over the insulation to create a smooth and sturdy surface for walking or storing items. Additionally, consider adding a floor covering such as vinyl or laminate for added durability and aesthetics.
Maintaining Your Insulated Shed Floor: Regular maintenance is key to preserving the effectiveness of your insulated shed floor. Inspect the insulation periodically for signs of damage or deterioration, such as water stains or mold growth, and address any issues promptly. Additionally, monitor temperature and humidity levels within the shed to ensure optimal comfort and energy efficiency. With proper care and maintenance, your insulated shed floor will provide years of reliable performance and comfort.
Conclusion:
Insulating the floor of your shed is a worthwhile investment that offers numerous benefits, from improved comfort to energy savings. By following the techniques outlined in this guide and paying attention to detail, you can insulate your shed floor effectively and create a more comfortable and functional space for a variety of uses. Whether you're using your shed for storage, as a workshop, or even as a living area, proper insulation will help ensure that it remains a comfortable and inviting environment year-round.
Visit Home Pick https://home-pick.co.uk